24mm Sorbitol motors: Drysophila Project: D16 Motor Assembly
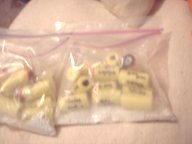
The finished grains if saved long term are placed in a sealed plastic bag. This bag is then placed in an outer bag that contains RV-dessicant.
Finished motors are stored this way also.
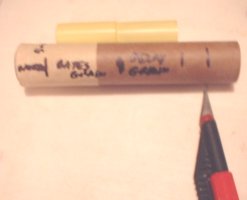
The casing is measured so that it is about 2cm longer than the length of two caps inserted.
This allows room for an epoxy end plug and the ejection charge.
Wider Kraft paper can make casings for 3 and 4 grains. Adjust nozzle throat accordingly. Nakka's SRM.xls file will help determine changes
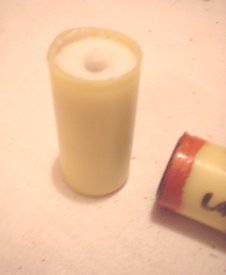
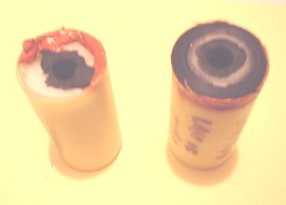
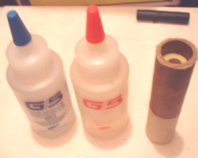
The delay grain has Ultra-Copper gasket goo added where it joins the yellow cap. Image Below left.
The image to the right shows the Bates grain with a little recess made by the pink washer that was used
The cores and part of the grain ends are primed with a meal powder* slurry. The slurry step can probably be omitted, but I like to use it in small motors thinking that it helps with more rapid ignition and pressure buildup.
I want to give every advantage for my rocket to have sufficient speed when it clears the launch rod. I have not tried these motors without priming, and after re-reading the link below (next paragraph) I'll probably keep using it.
This is not a formula webpage but due to more than one query about "meal powder" I would recommend the following site*:
Richard Nakka's Propellant Igniteability Experiment
That page doesn't describe "meal powder" in the strictest definition but it will work similar and is probably safer than meal powder.
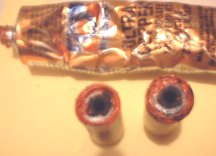
The Bates end is rimmed on Inner diameter with Ultra-copper and then matched to the delay grain washer end to ensure complete seal on assembly.
The plastic end of the drilled out Bates grain has Ultra-Copper added at the edges so that when inserted it will make a seal at the nozzle end.
Be careful not to add too much or it will ooze into the clay nozzle throat and plug it.
The Bates grain is inserted drilled plastic end first. This is followed by the delay grain open end with black washer first. The solid plastic end is then at the top. The black dot seen at the top is just a black marker spot. This spot makes it easier later when drilling the tap hole to make sure I drilled through the plastic into the top of the delay grain propellant.
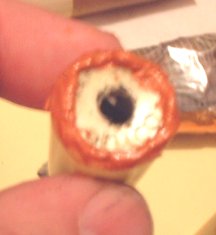
LEFT Below:
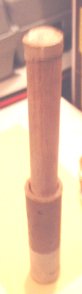
I use a dowel to make sure the two grains are well seated into each other and into the nozzle area.
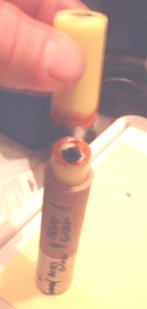
CENTER Below:
Epoxy is added to the top about 7 to 10 mm deep to make the end plug.
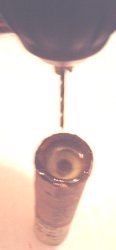
RIGHT Below:
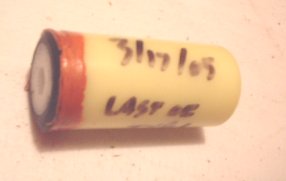
When epoxy is solid a 2.5 to 3mm drill bit is used to drill a center touch hole. I usually wait to do this step until launch day so I know I have a dry fresh contact to the ejection charge.
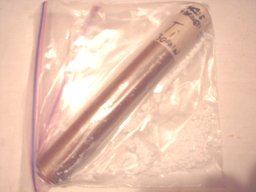
Finished motors are stored like the grains shown earlier
Three and a half grain Ti sparky in storage:
On flight day the touch hole is drilled. 2.5mm Drill just through the epoxy and yellow cap end to expose propellant. The delay can be shortened at this time by drilling deeper. For 1 second less delay drill approximately 2mm deeper into the propellant. Don't go too deep or you might turn the delay propellant into a cored grain under thrust. For delay changes more than 2 seconds less do this by adjusting the delay coring rod when pouring the delay grain.
Add a little ejection charge and work it carefully to fill the touch hole. Then add the rest of the charge and lightly tape the end closed.
You will need igniters that can fit through the 5mm nozzle. I have used nozzles down to 3mm. The igniter should be long enough to reach through the Bates grain core up to the delay grain.
There are sites for how to make your own igniters. I have had good luck with commercial copperheads as well.
To see how to build a two stage booster motor click here